Salut à tous
Suite à la
review des socles Darkmessiah, avec mon Xwing repaint, J'ai eu quelques questions sur ma méthode pour peindre la galaxy sur le socle. Donc nous y voila !
Hi all
Following the review of the darkmessiah base, with my little Xwing repaint, I got few question on how I have painted the galaxy on the base surface. So here we go !
Etant donné que j'ai peint ce socle si vite, et pas prévu initialement d'en faire un tuto, j'ai donc décidé de le refaire just pour vous ;)
Sur une feuille blanche, j'ai sous couché une zone en noir.
A
s I have painted this base so fast, and I was not planning to do a tutorial. Thus I have decided to do it again just for you guys ;)
On a white paper I undercoat with black primer, a round area
Vous pouvez voir les couleurs que j'ai utilisé. Peu importe en fait les couleurs, les galaxies sont si surprenantes en terme de teintes, allez voir sur google pour vérifier.
You can see also the color I used. No matter what colors you used in fact, galaxy are so surprising in term of colors, just check on google and you will see.
1 - Début de la nébuleuse
Commencons avec de l'orange/jaune pour former la courbe de base, pas besoin de précision ici, il y a du mouvement de toute façon, donc vous pouvez le créer maintenant.
1 - Starting the nebulous stuff
Stating with some orange/yellow color to create the basic shape, no need to be precise here, there is some movement anyway thus you can create it from here
2- Ajout de couleurs
Du violet, et rose, la trainée de la nébuleuse est formée, diluant de plus en plus la couleur, permettant d'intégrer au mieux la forme globale
2 - Adding colors
With purple and pink, the nebulous tail is made, diluting more and more the color allows you to integrate better the overall shape
3- Travail à la mousse de blister
Avec la mousse, j'ai voulu créer un aspect granuleux, violet et rose, en formant des amas. J'ai aussi commencé a éclaircir le centre avec du jaune/blanc
3 - Working with foam
Taking blister foam, I want to create a granulous aspect with purple and pink, on a kind of clusters.
I start also to make the center lighter with yellow/white
4- Ajout de blanc pour le contraste
The centre de la nebuleuse est désormais totalement blanc, mais pour créer le contraste, j'ai besoin de plus de point blanc de référence. Encore avec de la mousse, j'ai dispercé du blanc partout autours de la nebuleuse, et avec un pinceau, j'ai crée des points plus gros, y compris dans la spirale. J'ai aussi utilisé le pinceau pour générer des étoiles lointaines, avec des croix asymetriques, ici et la.
4- Adding white for contrast
The center of the star is now totally white, but to create the contrast I need more white reference points. Using again foam I spread white all over the galaxy, and with brush I create more bigger points, including inside the circular stuff of the star. I used also brush to draw some distant stars, by a little asymmetric cross her and there
5- Planète
Just un petit dessin ici, planete orange/rouge, avec un anneau violet.. pourquoi pas ? Ajout de blanc sur le coté et sur l'anneau pour le faire ressortir.
5- Planet
Just a little drawing here, orange reddish planet with a purple ring... why not ? adding more white on the side and the ring make it pop.
6- Corrections
La il s'agit juste de savoir ou vous arréter... J'ai fait des glacis sur les petites étoiles avec du jaune. J'ai passé des glacis de turquoise sur la nébuleuse, par ci par la. Ajout de points blanc, et correction des détails avec du noir pur.
6- Refining
Then it's all about knowing when you want to stop.. I have glazed over the little stars with yellow. I use also a turquoise glaze over the nebulous tails, and here and there. Adding some white spots, and correcting also with black when needed...
Ce n'est pas du tout une méthode universelle, mais la mienne, vous pouvez créer quelque chose de plus doux avec un aérographe, et une brosse à dent pour des points blanc plus aléatoires .. etc..
Amusez vous et expérimentez par vous même !!
This is not the only method, you can create something smoother with airbrush, with teeth brush to randomly spread white spots.. etc...
Enjoy and experiment by yourself !!
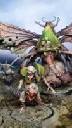
 |
| final work done on the base |